


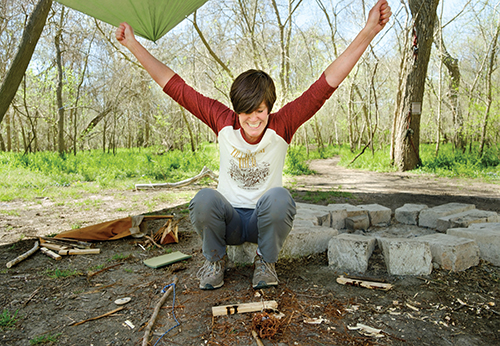
Writer Pam LeBlanc celebrates her mastery of the elements after starting a fire in the wilderness. Photos by Laura Skelding
By Pam LeBlanc
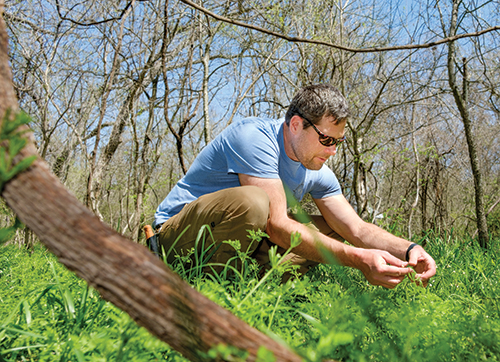
I'm sawing away like a lumberjack with a handmade bow, its cord wrapped around a wooden spindle. My arms pump furiously as I try to coax an ember from a piece of wood.

Making fire using nothing but a few sticks and a cord isn’t easy. I could walk to a convenience store and buy a lighter by the time a single sunflower seed-sized ember drops from my “fireboard” onto a waiting piece of bark.
The convenience store route would defeat the purpose of the day, anyway.
I transfer the glowing bead into a thumb-sized indentation in a bundle of fluffed-up cedar bark and blow gently. It bursts into a tiny tongue of flame. I puff a little more, and it gets bigger. And as it grows, a bolt of confidence sizzles through my soul.
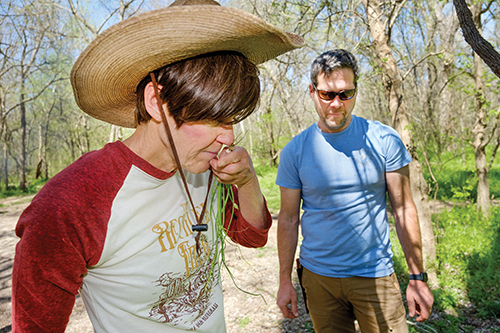
“I do think one of the coolest things you can learn to do in life is go out into the woods without a tool in your hand and make fire,” says Dave Scott, founder of Earth Native Wilderness School in Cedar Creek, west of Bastrop, where I’ve come for half a day to learn what it takes to survive in the wild without the trappings of modern-day life.
I have to agree with him.
But there’s more to surviving in the wilderness than making fire. By the time I leave this afternoon, I’ll know not only how to make fire, but also how to stay warm, hydrated and fed if I’m ever away from the comforts of home with nothing but my instincts, a couple of tools and these lessons.
Meet the expert
Scott, 41, opened Earth Native Wilderness School in 2011. It occupies 58 acres of wooded land west of Bastrop. The school offers programs for children and adults who want to learn how to live off the land or special skills. About 3,000 people — young and old — sign up for instruction or go to camps every year. The majority of the action is at the Earth Native campus, but there are some activities at Garey Park in Georgetown and McKinney Falls State Park in southeast Austin.
“It’s just people who like being outdoors and want to increase their skills or learn more about what it takes to take care of themselves in the wilderness,” Scott says. “We don’t get a lot of paranoid people, but with COVID and (2021’s statewide) winter storm, we are hearing from people who feel more vulnerable.”
The school’s style of wilderness training is more about learning confidence and enjoying time in the outdoors than about preparing for an apocalypse. Survival, Scott says, requires a steady disposition, some basic skills and an adjustment to an individual’s comfort level.
Scott grew up exploring Williamson Creek in South Austin. After his father bought land in Colorado, Scott spent summers there, rambling around in the forest. After his father joined a search and rescue team, Scott listened to emergencies unfold over the sheriff’s radio. When he was old enough, he trained for search and rescue work himself. After five years as a U.S. Army police officer, he spent three years training in wilderness survival, then became a survival skills instructor and eventually opened his school.
“I think the combination of my love of nature and wanting to be self-reliant made me to want to learn more about what it takes to take care of myself in the wilderness,” he said.
Lesson 1: Be prepared
The key to wilderness survival, Scott says, is planning ahead so you don’t find yourself in an emergency empty-handed. That’s why he carries a few basic items in his vehicle (see his list, Page 20C) to carry when he ventures into the wild: a small knife, something to start a fire and a water filter.
Still, emergencies happen. When they do, it’s important to stay calm. Take some deep breaths and quiet your mind.
There are three basic needs you must attend to: body temperature, food and water — or what Scott calls the survival triangle.
He makes it sound simple: “To me, the whole act of survival is problem-solving.”
Lesson 2: Not too hot, not too cold
Are you cool enough? Or warm enough? Can you maintain a comfortable body temperature with the clothing and shelter you have? If not, you should address this first.
If it’s hot, stay out of direct sunlight. Seek shade. Even better? Dip yourself in a creek if there’s one nearby.
If you’re cold, look at the materials around you. Try stuffing dry leaves inside your shirt to create a layer of insulation.
If you need to sleep, don’t lie directly on the ground. Lay down a bed of boughs first. You can also build a rudimentary shelter using branches and leaves, but that may not be necessary. Even finding a wind break or making one out of dirt or rocks can help.
“People think of shelter as a grand thing with a roof and fire, but that’s so much work,” Scott says. “More practically, prepare ahead of time. Carry lightweight things like a sheet of plastic to use as a wind block. And remember that movement and exercise help keep you warm.”
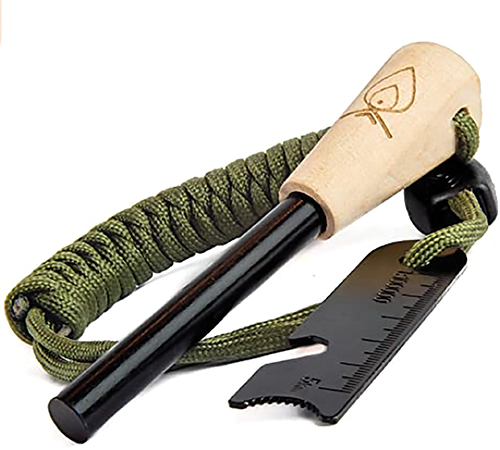
If you need fire to stay toasty — or to cook food or boil water — use what you have available to light it. Maybe you packed matches or a ferro rod, which is a small metal rod that sheds sparks when scraped with a knife (a good item to carry when backpacking). First, set dry, small twigs on fire, then work your way up to larger materials. Flat sticks burn better than round ones, and tree sap makes a good accelerant. Remember that flames burn upward, so start the fire from the bottom.
Creating a fire with the bow drill method I used takes practice, but it’s not impossible. From start to finish, it took me about an hour. Start by preparing a tennis ball-sized nest of shredded dry bark (I used juniper). Then you’ll make a fireboard by cutting chocolate chip-sized divots into a length of wood (we used a thick piece of trumpet vine). Next, carve notches leading from the divots to the edge of the fireboard.
After that, sharpen one end of a stick that is about an inch thick and a foot long to make a spindle. Then fasten a cord (use a natural fiber or vine if you don’t have a cord) to both ends of a curved branch (I used a juniper bough) to serve as a bow. Last, find a block of wood about the size of a deck of cards to use as a “handhold.”
You’ll twist the spindle into the cord on the bow, place the tip of the spindle onto the fireboard and brace your arm against your body. Clamp down with the handhold, then start to move the bow back and forth.
It’s wobbly at first, but after a few minutes you’ll find a rhythm. If you’re doing it right, in a few minutes a fine dust will fill in the notch in the fireboard. If all goes well, the heat created by friction will carbonize that dust and create an ember.
Tap that ember onto a leaf or bit of bark below your fireboard, then carefully plant it inside the wad of fluffed-up bark and blow gently.
Voilà, fire.
Lesson 3: Food for energy
Once you’ve taken care of your body temperature, you need to think about replacing calories lost through activity.
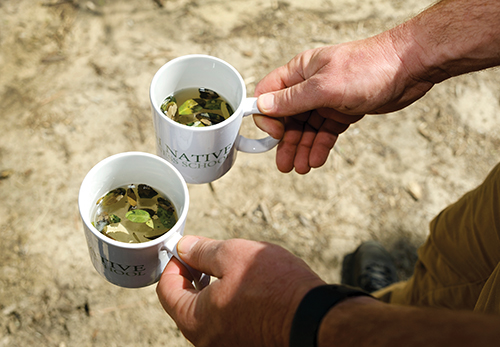
Here in Texas, we’ve got lots of options. I followed Scott as he foraged around his property, choosing bits of plants like he was moving through a salad bar.
First, he plucked a ruffled green leaf from a dock plant and offered me a nibble. It tasted slightly tart and lemony. Then he pulled up a few wild onions. Cleavers, those sticky, low-growing weeds that feel like a cat’s tongue (I call it Velcro plant), can be cooked down like spinach. He calls wood sorrel the “Skittles of the woods” for its tangy zing. Dewberries, mesquite beans, wild blackberries and pecans are all tasty options, too.
Other plants can be used for medicinal purposes. He points out a toothache tree. Chew its leaves or twigs to numb your tongue. Crush the leaves of a small plantain (different from the bananas that go by the same name), and use it to treat insect bites or inflammation.
We also brewed tea, toasting up a pan of yaupon leaves for 30 seconds, then pouring hot water over them. It’s an acquired taste — nutty and earthy — but loaded with caffeine.
Of course, exercise caution to make sure you know what you are eating. Learn more about foraging for food in Texas with the books “Wild Edible Plants of Texas” by Charles Kane, “Foraging Texas” by Falcon Guides and “Common Edible and Medicinal Plants of Texas” by Wesley Adams.
For something heartier, look no farther than the nearest creek or lake. A plastic water bottle can be converted into a minnow trap. Just cut the top off and invert it, so minnows get washed in but can’t back out. You can eat them raw if need be, or cook them up over a fire. “The skin crisps up and the tail is good,” Scott chuckles.
Lesson 4: Don’t dehydrate
You need water to stay alive. If you didn’t bring a water bottle or filter with you into the outdoors, you’ve still got options, although there are fewer if you’re in a desert environment.
Use a rock or a hole lined with leaves to catch rainwater. If you have a container, boil the liquid over a fire to purify it. If you don’t, squeeze it through a T-shirt, then let it settle in the sun for at least six hours (longer if the sky is cloudy).
My favorite solution? Wild grapevine. It grows all over Central Texas and can be as thick as an adult’s arm. Cut through a section of thick vine, then put a container (or a rock with a hole in it) at each end. You can drain up to a liter (four cups) of water from a healthy plant.
Lesson 5: Keep calm and carry on
In the end, a level head will go a long way toward staying safe.
Stay calm and remember priorities. Don’t rehash whatever mistakes you’ve made to find yourself in a bad situation. You can analyze that later.
And don’t feel sorry for yourself. “In an emergency or real crisis, you can’t afford to do that. It’s not useful,” Scott says.
Instead, take a deep breath and keep it all in perspective. “Humor and the ability to not take yourself too seriously are the best survival skills of all,” Scott adds.
A little dollop of humor helped me make that fire and propelled me through the rest of my wilderness survival training. They are skills I hope I never have to use, but if I do, I’ll know it’s possible to survive out there — even without a lighter.
Vehicle essentials: Plan ahead to survive in the wild
If you are stranded — temporarily, hopefully — in a remote wilderness location, the best strategy is to have planned in advance for the unexpected. Dave Scott, the founder of Earth Native Wilderness School west of Bastrop, recommends stocking your vehicle with these supplies in case you ever find yourself in such a predicament.
Vehicle gear
- Two flashlights
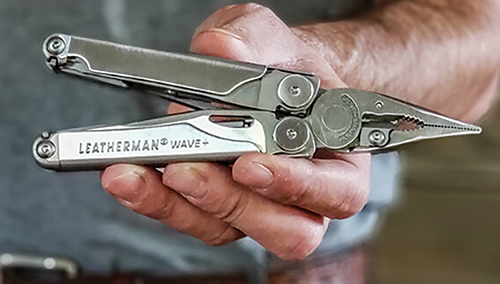
- Multi-purpose tool (Leatherman or something similar)
- Non-folding knife (Morakniv makes good quality inexpensive knives.)
- Extra weather-appropriate clothing: long-sleeved sun shirt, hat in heat; insulated jacket, knit cap, gloves in cold.
- Emergency water — 2 gallons
- Battery jumper pack: Scott prefers these to jumper cables because you aren’t reliant on another vehicle. Make sure to get one large enough to jump your battery. If you have a truck or large SUV you need a more powerful one than if you have a sedan. Small pack to carry if you need to leave your vehicle (see list below)
- Good first aid kit (such as Adventure Medical Kits’ backcountry version)
- Sleeping bag or wool blankets in cold weather
- Lightweight water filter (such as Sawyer mini system)
- Paper road maps or map book (Gazetteer) of your state, nearby cities
- Emergency road flares
In addition to the gear in your vehicle, keep a small, dedicated emergency pack, like a fanny pack with a shoulder strap, as an emergency tote. Stock it with these items:
Tools
- Quality non-folding knife
- Compass
- Multi-purpose tool
- LED flashlight with an on/off switch (one that will burn for many hours even if that means lower lumen power); two sets of extra batteries for light
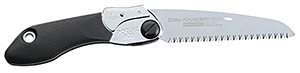
- Folding saw, like a Silky Pocketboy
Fire
- Two to four fire-starting options (hurricane matches, lighters)
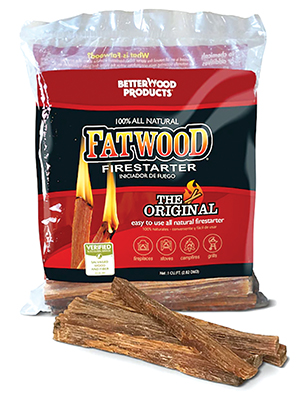
- Fire starters, like fatwood
Shelter
- Emergency ponchos
- Three thick, extra-large trash bags for use as a wind break or to pull over your body
- Lightweight small tarp (Scott recommends lightweight tent floor with webbing attachment at corners, or painter’s plastic if you can tie a sheet bend knot)
Water
Iodine or similar water purification tablets
Two clear, 2-liter water-carrying bags
Stainless steel water bottle
Food
- Small amount of high-calorie food (Scott recommends 500-1,000 calories a day)
- Sugar and salt packets
- Emergen-C or other electrolyte replacement
Additional items
- Mini first aid kit
- Extra pair of prescription glasses
- Small amount of prescription medication if critical 30 feet of paracord rope
- Several gallon-size Ziploc bags to keep items clean, dry
- Whistle
- Signal mirror
- Small fishing kit (think small pill-bottle sized with hooks, line, weights and maybe a synthetic worm or small lure)
- Pencil notepad (Write in the Rain makes a waterproof pad)
- Some flagging tape to mark route on trees, branches if you leave vehicle
EARTH NATIVE WILDERNESS SCHOOL
137 Woodview Lane
Bastrop, Texas, 78602
earthnativeschool.com 512-299-8870
COURSES INCLUDE:
- Two-day Wilderness Survival 101 for adults includes strategies for surviving emergencies, fire lighting using friction; basic shelter building, finding edible/medicinal/useful plants; water collection and purification, food/foraging techniques, knife/tool use and more; $245
- Individual day or weekend adult skill courses include land navigation, wildlife tracking, basket making, edible/medicinal plants and more; from $45 to $245
- Ongoing adult intensive courses include wilderness survival, wildlife tracking; one weekend a month for 8 months; October-May; $2,495 to $2,995 (payable in installments)
- Youth classes, ages 5 to 16, include Wild Outside weekly class throughout school year; $1,995 (payable in installments); and individual one- and two-day weekend classes; about $55 a day
- Preschool classes, ages 3½ to 5, one- or two-day a week programs at Wild Life Forest Preschool; monthly and one-day weekend classes during the school year; prices vary
- Summer camps include five-day sessions at three locations: Earth Native's campus in Bastrop, McKinney Falls State Park in southeast Austin or Garey Park in Georgetown, $375; five-day overnight camps at Earth Native campus in Bastrop. $695; camps are full this summer